
Note: the following process should be followed for all Hyperstat types. Variations in procedure are noted where relevant.
Before beginning the Hyperstat provisioning process, you will need the following components:
- Flash Station PC
- Atmel-ICE tool
- Test CCU
Step 1: Powering and connecting the Hyperstat
Remove the Hyperstat from the box and separate the two sides either by prying on each corner with a case knife, or by hooking your finger through the hole on the back and pulling sharply while holding the front edges. The Hyperstat back board can now be connected to power.
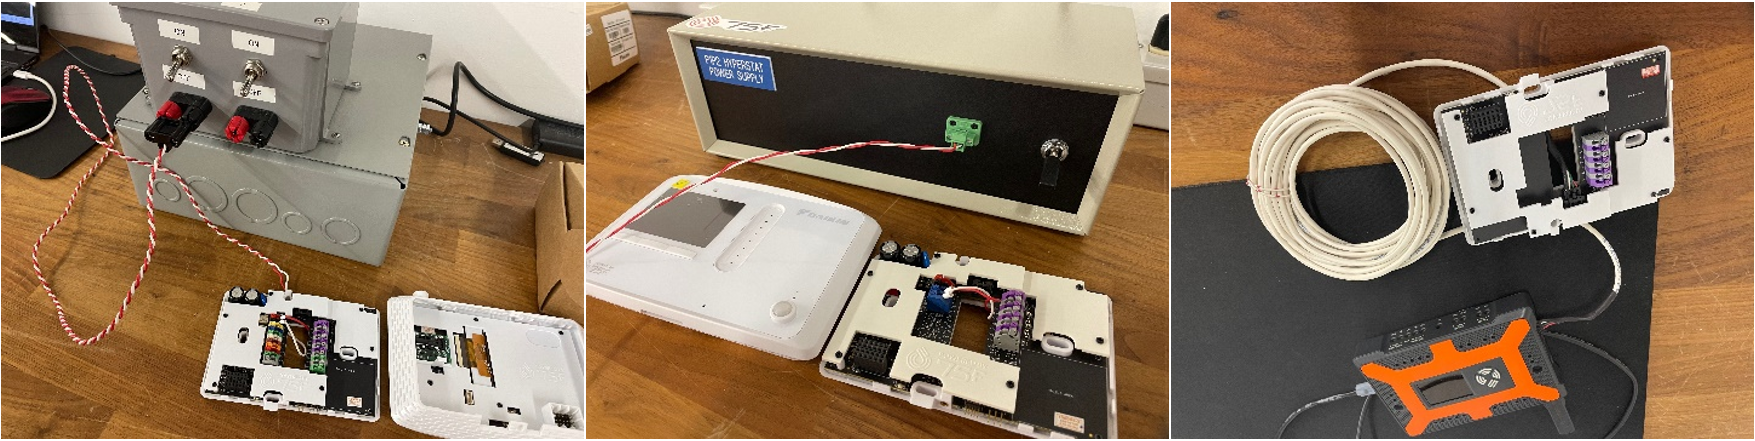
Different variants of the Hyperstat require different power sources:
If you are provisioning a 75F Conventional Hyperstat, connect power using the 24VAC power supply. This connection is polar; connect the red cable to the red terminal, and the white cable to the black terminal
If you are provisioning a Daikin branded VRV Hyperstat, connect power using the P1P2 power supply. This connection is not polar; connect the cables to the two blue connectors in either order.
If you are provisioning a 75F Hypersense, connect a Smart Node to the 24VAC power supply, then connect the Hypersense to the Smart Node using a four pin Molex cable. The connectors are on the right side of the Smart Node and the upper half of the Hypersense back board.
Step 2: Flash the Hyperstat back board
Note: Step 2 should be skipped if you are provisioning a Hypersense board; proceed directly to Step 3 if this is the case.
Turn on the power supply, then connect the cable from the Atmel-ICE tool to the small 10-pin connector on the side of the Hyperstat back board.
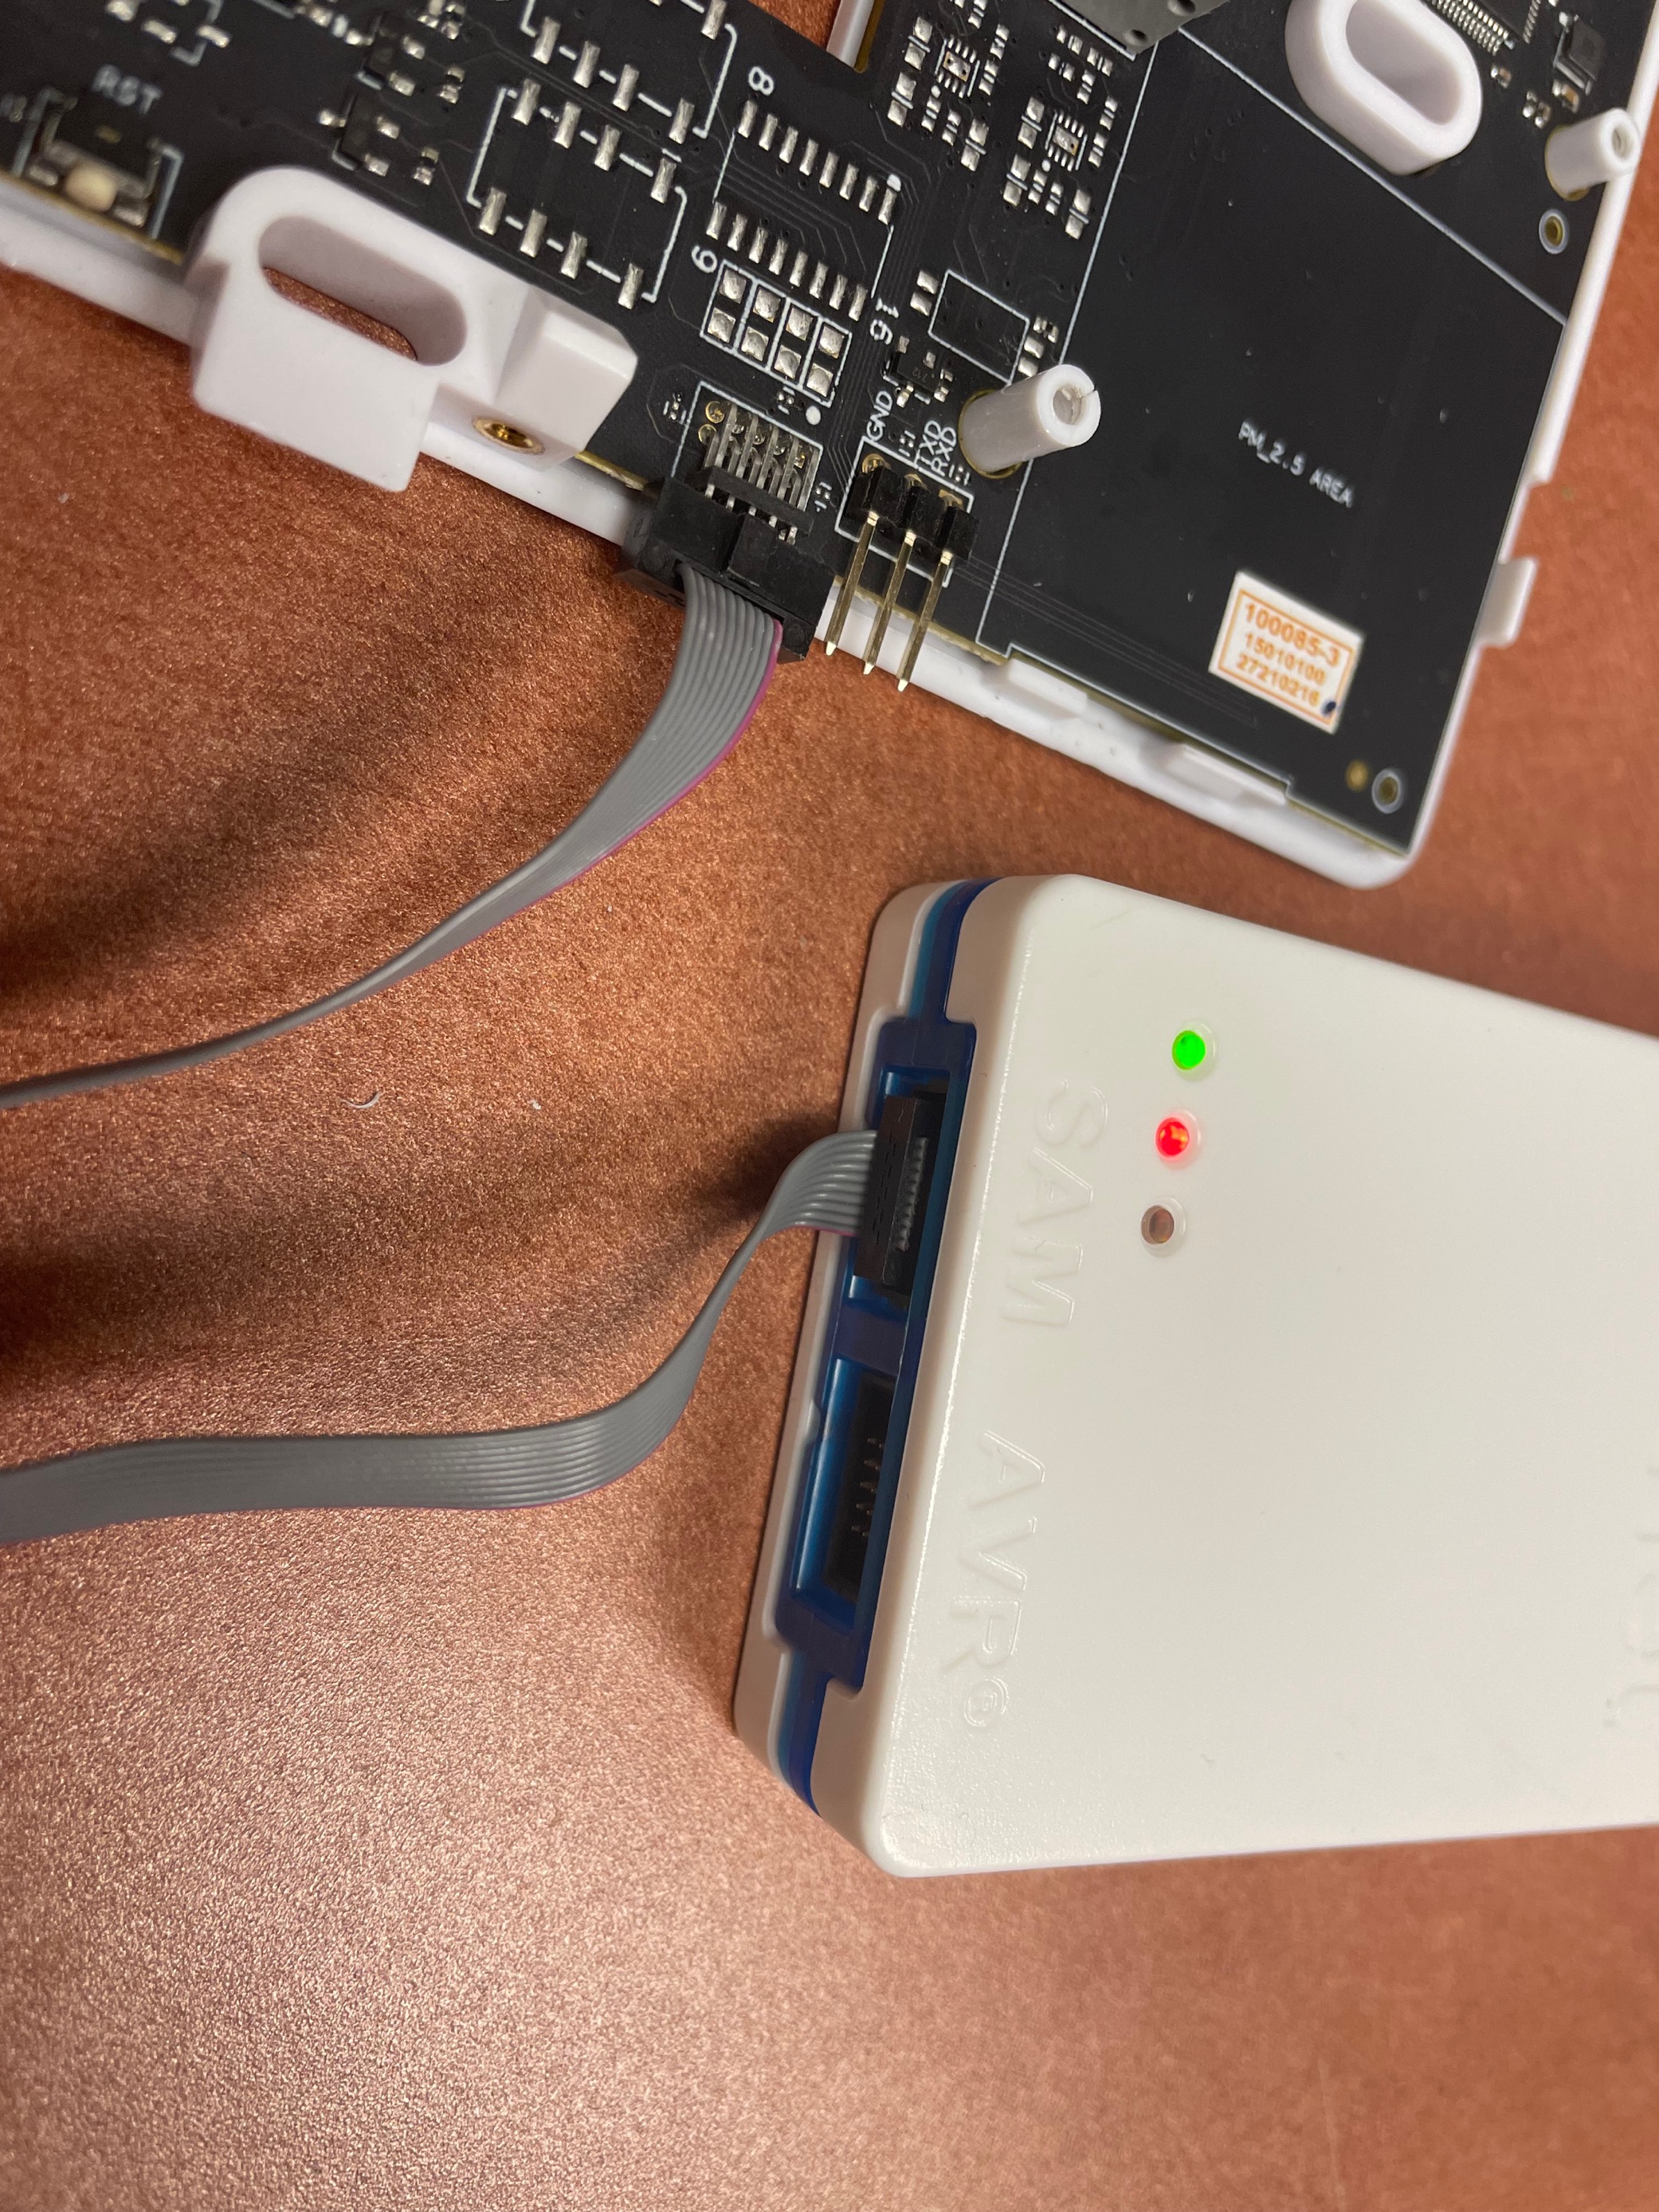
This connection is polar; if the following step fails you may need to reorient the connector.
To flash the Hyperstat, the PowerShell terminal is used. If it is not already open, double-click the PowerShell icon on your desktop to open it.
In the PowerShell terminal, type the following command, then press enter:
.\interface
Once you press enter, the terminal should begin to run the command, with the output reflecting this. It takes approximately one minute for this flash to complete. Once you see the cursor reappear, the flash has completed.
Step 3: Flash the Hyperstat front board
At this point, place the Hyperstat front board face down next to the Hyperstat back board. Unplug the Atmel-ICE cable from the Hyperstat back board and plug it into the 10-pin connector on the Hyperstat front board, keeping it in the same orientation as you do so.
Place the Hyperstat front board onto the back board and press down to connect the two together. When facing the front of the Hyperstat, be sure to press down the bottom-left corner first, so as not to damage the connector between the two boards.
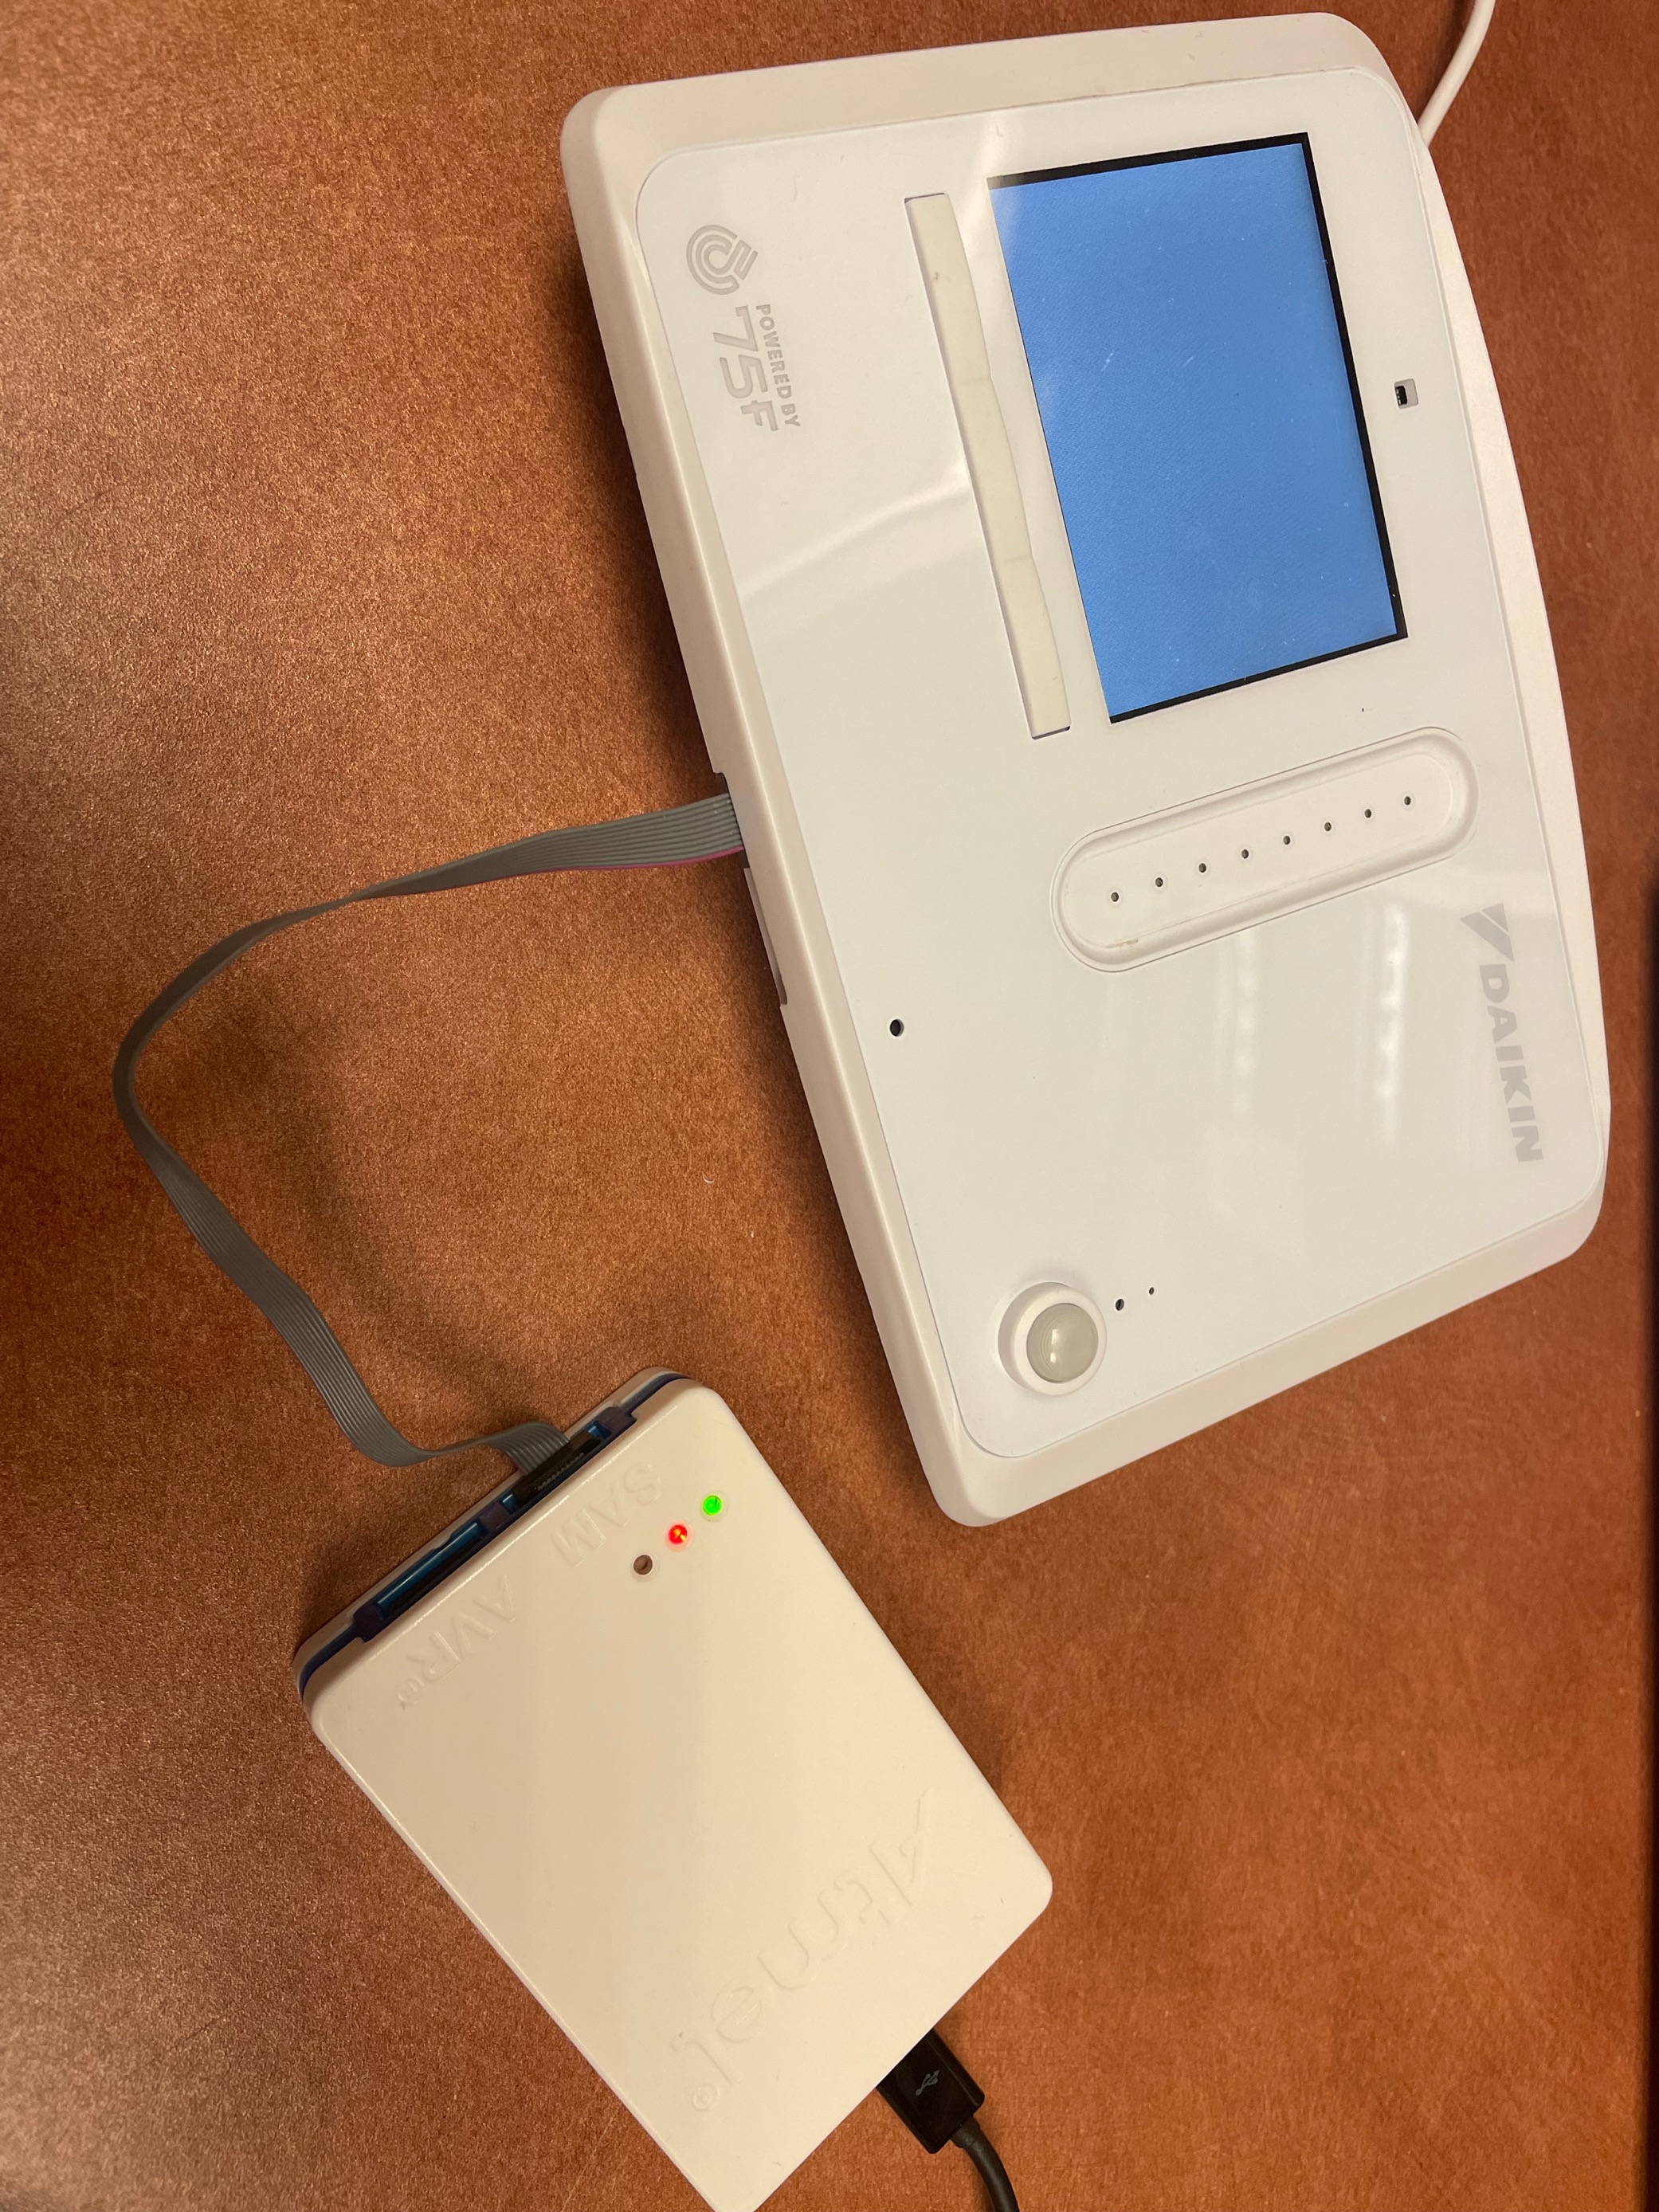
In the PowerShell terminal, type the following command, then press enter:
.\hyperstat
Once you press enter, the terminal should begin to run the command, with the output reflecting this. It takes approximately three minutes for this to complete. Once you see the cursor reappear, the flash has completed.
Disconnect the Atmel-ICE cable from the Hyperstat.
Step 4: Testing the Hyperstat
You should have a CCU prepared at your test bench for the following steps with a test floor and zone configured for pairing Hyperstats.
With the Hyperstat powered on, hold down the middle and right buttons on the front of the device until the “Inputs” menu appears. Press the middle button twice to cycle to the “Version” screen and verify that the listed firmware versions for the front and back boards correspond to the versions you flashed in the preceding steps.
Press the middle button four more times to cycle to the “Installer Options” screen. Press the right button to navigate to the “Pair with CCU” option, then press the left button to select the option. At this point the Hyperstat will enter Advertising mode and will display a unique MAC address.
On the Test CCU, select the “Pair Device” option to the right of your test zone in the “Zone Layout” screen. In the following screens, select the Hyperstat option, then select either the “Conventional”, “VRV”, or “Sense” profile, depending on the Hyperstat version you are provisioning.
On the device list screen, select the MAC address of the device that you are provisioning. Note: multiple MAC addresses may be present if multiple devices are in advertising mode. The last four digits of the MAC address can be used to identify your device.
In the following window, enter the six-digit PIN from the display on your Hyperstat, then tap the green enter button. If the PIN is correct, you will be prompted with the Zone Configuration window. Scroll to the bottom of this window and tap “Set”.
On the Test CCU, return to the Status screen by tapping the dial icon in the upper right corner of the screen. You will see your test zone. Wait until it displays a temperature value from the Hyperstat – this will confirm that the communication between the devices is working. You may be able to expedite this waiting period by toggling between the Settings and Status screens.
Step 5: Factory Reset and Repackage the Hyperstat
If the pairing test was successful, you can now factory reset the Hyperstat. Hold down the middle and right buttons until the “Inputs” menu appears, then press the middle button six times to cycle to the “Installer Options” screen. Press the right button three times to navigate to the “Factory Reset” option, then press the left button to select it. On the following screen, press the middle button to confirm your choice. After a couple seconds, the screen will turn white and the Hyperstat will restart.
Verify that the reset was successful by pressing the middle and right buttons to return to the “Inputs” menu, then press the middle button two times to return to the “Version” screen and ensure that the zone name is “Hyperstat” and the address is blank.
Turn off your power supply, then disconnect the Hyperstat front board and back board, and unplug the cables from the power supply by depressing the levers on the connectors and pulling the cables out.
Reconnect the Hyperstat front board and back board and return it to its box. At this point the 75F Hyperstat provisioning process is complete, and the Hyperstat is ready for packing and shipment.
Comments
0 comments
Please sign in to leave a comment.